Find the correct patient portal by selecting your state.
Next, select the imaging group that provided your service:
Beverly Radiology Medical Group San Diego
Diagnostic Radiological Imaging
Hanford Advanced Imaging
Kern Radiology
MammogramNow
Mink Advanced Imaging
Modesto Advanced Imaging
NorCal Imaging
Pacific Advanced Imaging
RadNet Antelope Valley
RadNet Central California
RadNet Coachella Valley
RadNet Inland Empire
RadNet Long Beach
RadNet Los Angeles
RadNet Medical Imaging San Francisco
RadNet Orange County
RadNet San Fernando Valley
RadNet San Gabriel Valley
RadNet Temecula Valley
RadNet Victor Valley
Rolling Oaks Radiology
Santa Rosa Imaging Medical Center
Stockton Diagnostic Imaging
Valley Radiology Imaging
Advanced Radiology
American Radiology Services
Chesapeake Medical Imaging
Community Radiology Associates
Patient Guide
Patient Portal: Image Download & Sharing
A step-by-step guide to viewing, downloading, and sharing your exam images and reports through the RadNet Patient Portal.
During registration, you'll be given a form (the Portal Pass, located in the Print Forms box) with everything you need to access the Patient Portal to view and share your images and reports online.
01 Patient Record Availability Timelines When images and reports become available on the portal.
Images
Available as soon as your exam is completed.
Reports
Available once your exam is signed by the radiologist.
TX only
Due to TX Law (SB922), reports are made available on the portal 4 days after they are signed and sent to your Referring Physician for review.
CA only
Due to CA Law (SB1419), reports are made available on the portal 4 days after they are signed and sent to your Referring Physician for review.
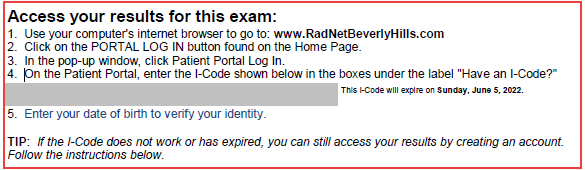
02 How to Access the Portal Use your Portal Pass — I-Code or full account.
Your Portal Pass contains the instructions for accessing the Patient Portal:
Option A
Use your I-Code
Follow the instructions for [I-Code] on your form to view your exam after your visit.
* Each I-Code only shows exams from that visit. For exams from a different visit you'll need a new I-Code — or create an account to access all your records.
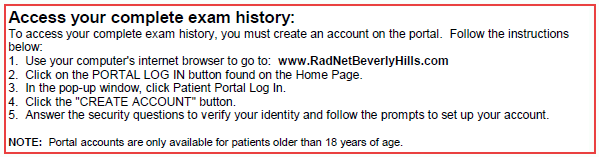
Option B
Create an Account
You can also "Create an Account" to view your complete exam history.
Getting to the login screen
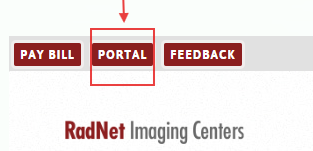
Open the Regional Portal
Go to the Regional Portal website listed on your Portal Pass and click Portal.
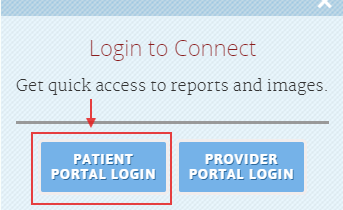
Choose Patient Portal Login
A pop-up box appears — click Patient Portal Login.
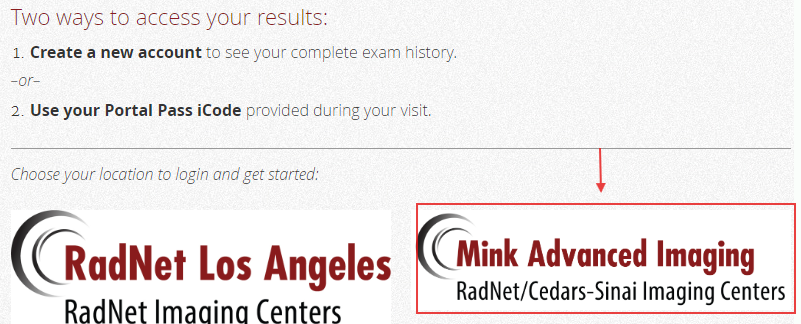
Pick your location
Click or select your location on the screen that appears next.
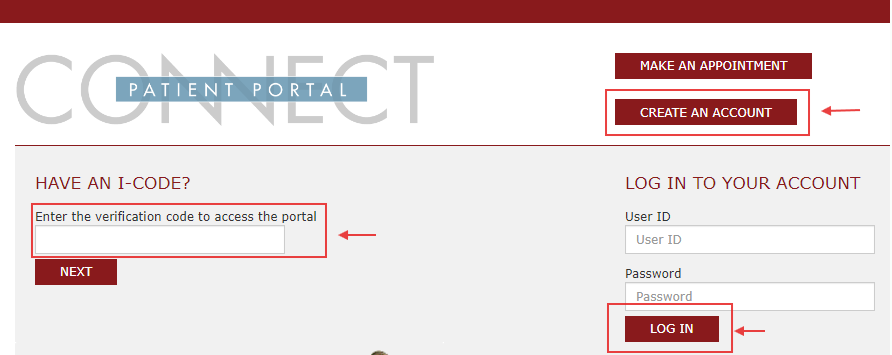
The main Patient Portal screen
On the main Patient Portal screen, you have three options:
Enter your I-Code
View exams from a single visit.
Log in to your account
Sign in to your existing RadNet Patient Portal account.
Create a new account
Set up a new Patient Portal account to access your exam history.
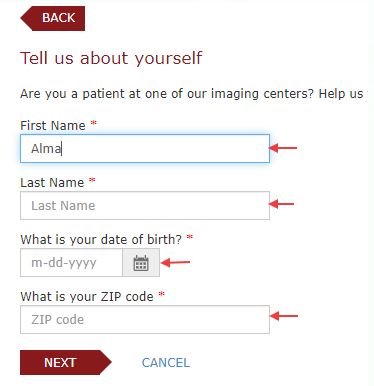
03 Creating a New Account Set up your Patient Portal account in 4 steps.
Tell us about yourself
Enter all required fields in the "Tell us about yourself" section, then click Next.
Verify your identity
Answer all the questions in the "Verify your Identity" section, then click Next.

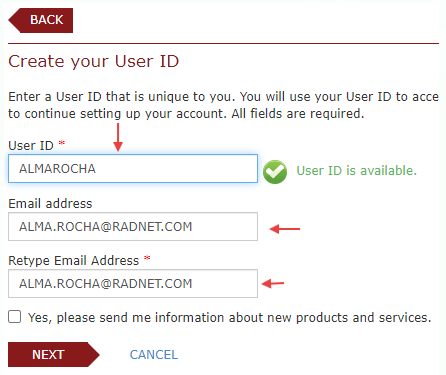
Create User ID and email
Create your User ID and enter your email address. Click Next.
Email verification
A verification email will be sent to the address you provided. Enter the validation code from the email into the "Validation code" box. Once entered, your account is created and you can Log In to access your exam history.
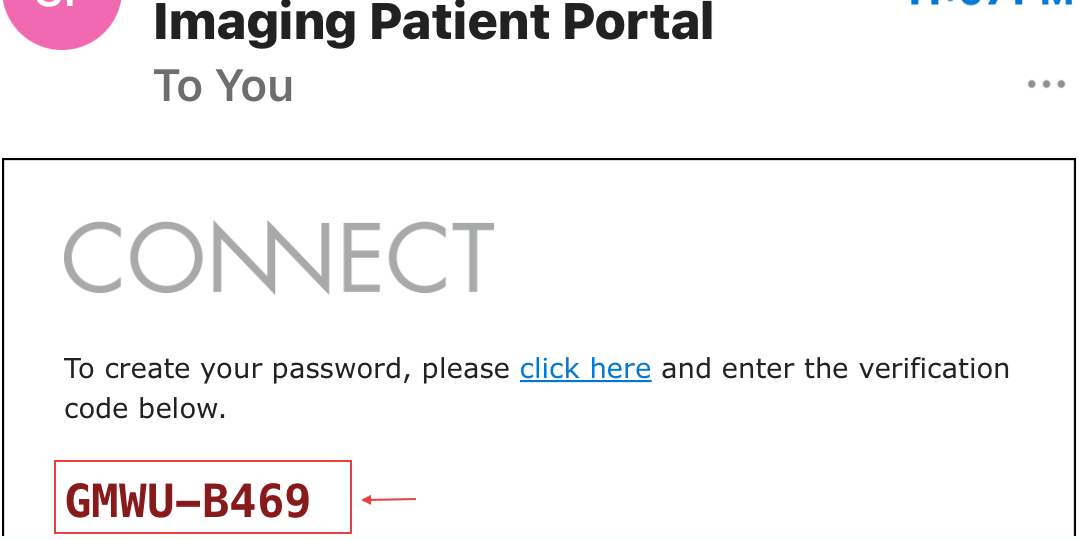
The verification email 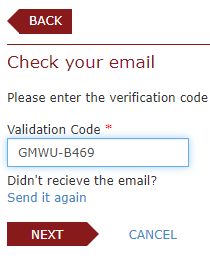
Enter the validation code 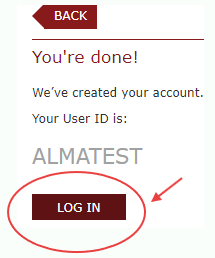
You're done — click Log In
04 Viewing a Study Visit Summary, Report, and Images tabs.
On the left side of the screen you'll find a list of all your exams. Once you select an exam, the following options appear (via tabs):
Tab
Visit Summary
A summary of your visit (similar to the "Clinical tab" in eRad RIS).
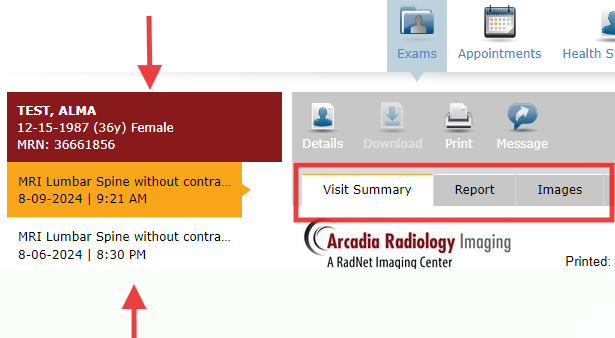
Tab
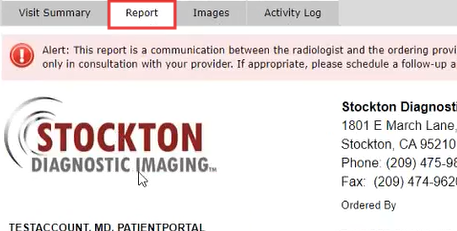
Report
View your diagnostic report — and you can print it.
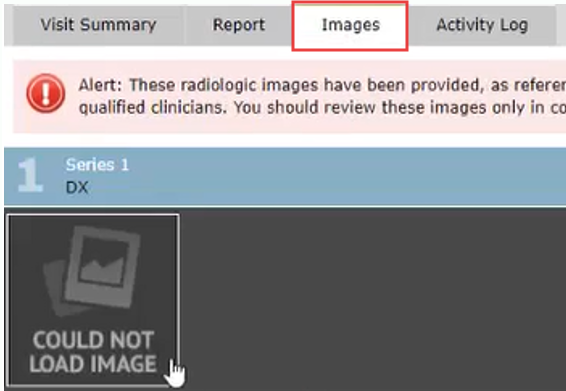
Tab
Images
View only the single image corresponding to the selected="selected" tile, in JPG format.
05 Downloading a Study Pick a format, acknowledge PHI, then save.
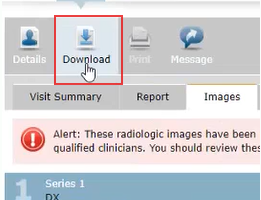
Start the download
Open the Images tab
Select your exam, click the Images tab, then click the Download button.
Choose file type
Select your desired format under the "Choose file type" field. The Need Help link explains the different file formats (
.zipand.iso) and includes a disclaimer about how long the download may take.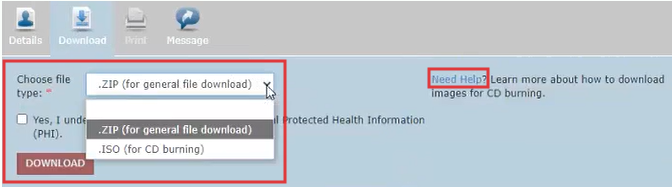
Choose file type 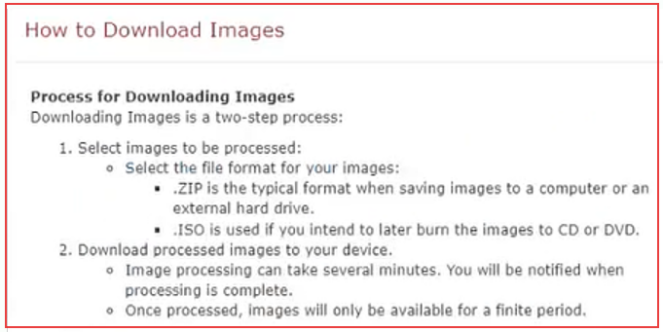
Need Help — format info
Acknowledge PHI
You must acknowledge that you are downloading Protected Health Information by checking the box that states:
"Yes, I understand that I am downloading Protected Health Information (PHI)."
Once acknowledged, you'll be able to click Download.

Prepping your images
The system may take a few minutes to prepare your images. You can wait, or enter your email to be notified when they're ready (you can log out and return when the email arrives). The email contains a link back to the portal login page.

Please note
The email does NOT mean your files have already been downloaded. It only prompts you to return to the Patient Portal to download the requested images.
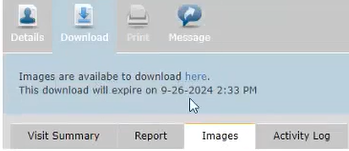
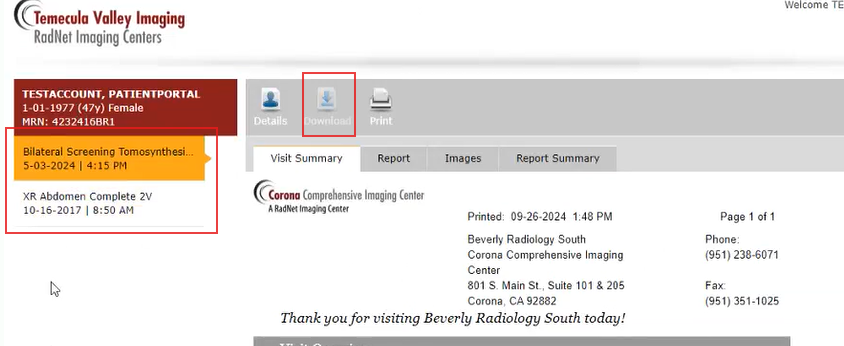
Images ready for download
When your images are ready, an icon appears next to the completed study on the left side of the screen.
![]()
![]()
Downloading your images
Select the study you want, click the download icon, then click the "here" link to start the download. Downloads aren't available indefinitely — you'll be notified before your images are no longer available (images are available for 24 hours).
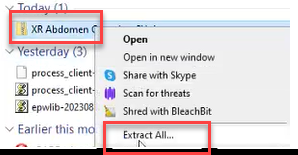
Open your downloaded study
Once the download is complete, you'll see a notification: "Images were successfully downloaded." To open or use them, you must extract/unzip the folder first — the viewer (or another DICOM program) will not open the files directly from the zip.
Save As
Click Save As to save the studies to your files. Right-click the study and select Extract All to access the files.
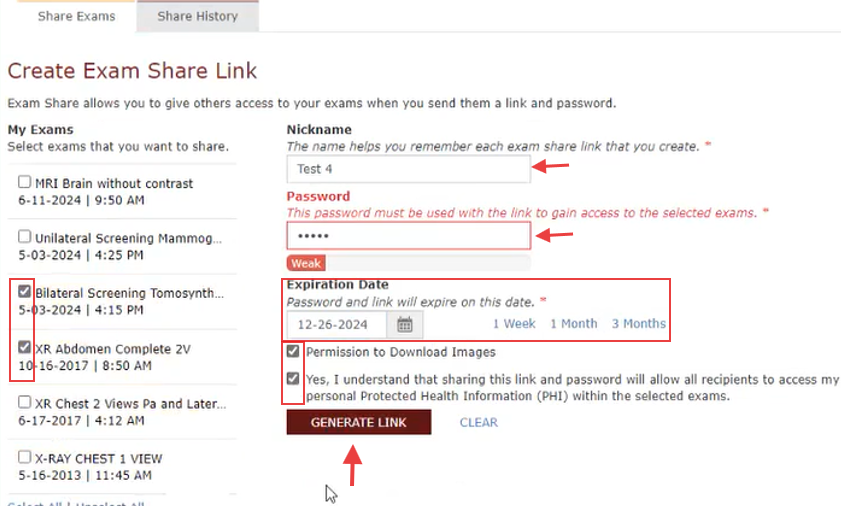
06 Sharing a Study via Link Generate a password-protected link to share.
Click the Share icon at the top right of the screen. This redirects you to the Create Exam Share Link screen.
![]()
Create Exam Share Link fields
Select the exams you want to share from the list on the left (using the checkboxes).
Nickname
Used to identify the share link(s) you've created.
Password
Required so the recipient can access the study.
Expiration Date
How long you want the link to stay active (no limit on duration).
Permission to Download Images
Choose whether the link allows images to be downloaded, or is view only.
Acknowledgement
Check the box: "Yes, I understand that I am downloading Protected Health Information (PHI)."
Generate Link
Click this to create the link for the study or studies you're sharing.
Copy the link
Option 1
Click the icon to the right of the link.
Option 2
Right-click the blue link and select Copy.
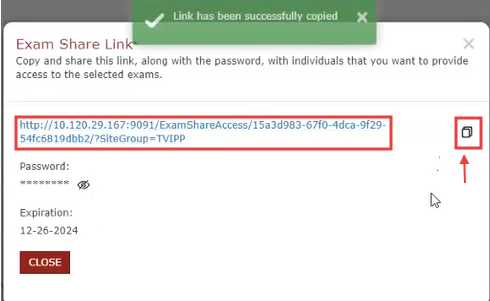
Please note
The password is NOT included with either copy method — you must send it separately to whoever you're sharing the link with.
Accessing shared images
When the recipient clicks your link, they'll be prompted to enter the password associated with it.
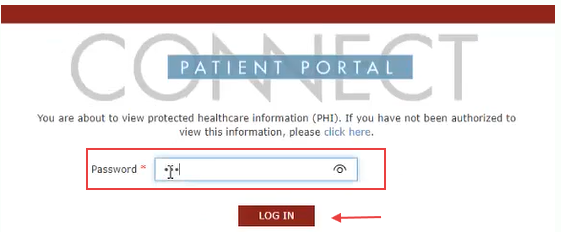
Once the password is entered successfully, the recipient sees a view similar to yours, but limited to only the studies you shared. If you enabled image download, the recipient can also use the download button (it appears when a study is selected="selected" from the left column). Their download experience is the same as yours.
07 Minors Special rules for minors' records and I-Codes.
Account creation
Minors cannot create accounts in the Patient Portal. If an appointment needs to be scheduled, it can only be done as a guest.
Accessing records
If records are needed, they must be accessed using the I-Code given at the time of the exam. I-Codes are exam (or visit) specific. Depending on how the exams are scheduled, there could be one I-Code for the visit or multiple — e.g., MR T & L Spine on the same DOS could have one I-Code or two. If there are multiple dates of service, you'll need to use the I-Code for each individual study. The I-Code does NOT grant access to all records — only that one study or visit.
Once accessed
Once a minor's records are accessed, you can share or download images as well.
I-Code expiration
I-Codes expire after 90 days. After that, you can submit a Get Help request to reactivate it for another 90 days.